Well, it seems like the semester has come to an end. For the last three years – give or take – I have wanted to get out of my house and out into my yard. But I never could find the motivation to do it. I am so glad that through this experience I have been able to make my yard a little oasis while also learning the power of blogging – a tool I hope to use in my classroom soon.
So, I guess one question remains – where to next? Everything in my yard is flourishing and in the coming months I will need to harvest all the vegetables and herbs and by the end of September, I will need to start preparing everything for winter.
Creeping Junipers
Update: My creeping junipers are definitely the least interesting plant I planted this year. Overall, and quite anti-climatic, I have nothing to report here. My junipers are thriving and that’s about it. According to Google, it can take a few years to see any sort of growth from this plant so set a reminder in your phone and check back in 2027!
What’s Next: Again, there isn’t much left to do with my creeping junipers. According to The Spruce, junipers don’t require regular pruning, but they can be cut back if they get too big. As for fall/winter care, there doesn’t seem to be much:
- Water junipers more often in the fall to ensure they are well hydrated before your first frost.
- Place 2 or 3 inches of mulch around the tree to conserve moisture and help to maintain a more even soil temperature. Be sure to leave 2 or 3 inches of space between the mulch and the trunk.
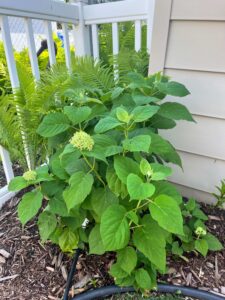
Hydrangea
Update: My hydrangea bush is doing very well. This week we started to see our first flower blooms!
What’s Next: According to Gardener’s Path:
“All that’s typically needed is a hard haircut in winter. Cutting the plant down to the ground – with just a few inches of stem remaining – encourages vigorous new growth when the plant wakes up from dormancy.
If you prefer to encourage upward growth you can elect to cut the plant back to one to three feet up from the soil level, but generally, the harder the haircut, the happier the plant.
Come early spring, apply a slow release fertilizer with a balanced NPK ratio (10-10-10) to support strong root systems and healthy new growth.”
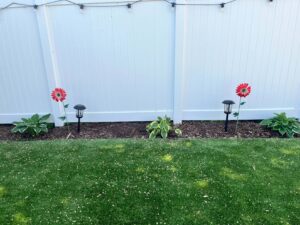
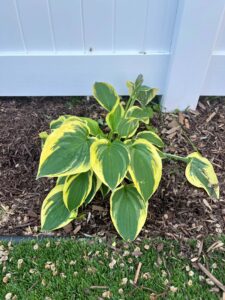
Hostas
Update: Again, as with mostly everything in this post, my hostas are doing wonderful. We had a minor issue when we received some hail, but since hail doesn’t damage the roots it was all good! Overall, the hostas seem to be growing every day and it looks like we will be seeing some flowers soon!
What’s Next: According to Gardening Know How:
“To begin winterizing hostas, if necessary, keep supplying them with an inch (2.5 cm.) or so of water per week throughout the fall. If you have been fertilizing the plants, stop feeding them in late summer or they will continue to produce leaves. These tender new leaves can make the entire plant, including the crown and roots, susceptible to frost damage. As nighttime temperatures drop, hosta foliage will begin to dry out and fall over. Wait until the leaves have fallen over before continuing with any hosta winter preparation. Why is this important? The leaves are needed post-bloom to produce food for the next year’s growth. Further Hosta Winter Care While there isn’t much that needs to be done for hostas in winter, the foliage should be trimmed back. Once the leaves have fallen naturally, it is safe to cut them. Use sterilized shears (sterilize with a half/half mix of rubbing alcohol and water) to prevent fungal infection or rot.”
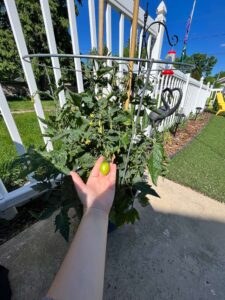
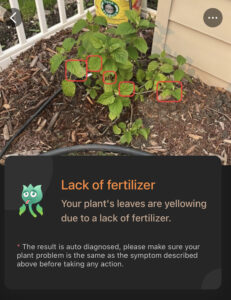
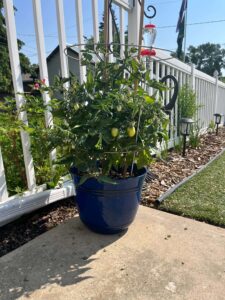
Roma Tomatoes
Update: Of all the things I planted, I feel like my tomato plant is doing the best! We did have an issue with some wilting leaves, but it turns out it just needed a TON of water (apparently daily watering wasn’t enough). As of right now, I bet we have at least 40 tomatoes growing. It has now become a community affair with my neighbours routinely asking about my tomatoes.
What’s Next: As of right now, the tomatoes just need some more time to grow. According to The Spruce:
“Roma tomatoes are ripe and ready to be harvested when they are evenly colored red. They should still be firm so don’t let them turn overripe on the vine.
If cold fall weather hits and you still have green Roma tomatoes on the plants, pick them all and ripen them indoors in a paper bag or wrapped in newspaper. They won’t all ripen the same way as outdoors but at least you can save a few.”
In the winter, the plant will have to go to plant heaven as roma tomato plants are annuals so that’s a bit disappointing.
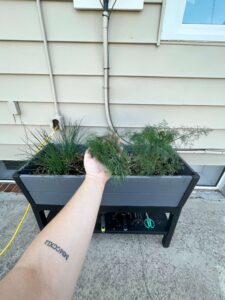
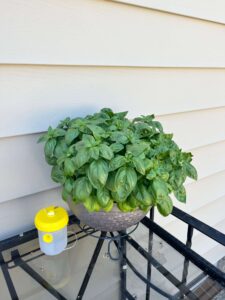
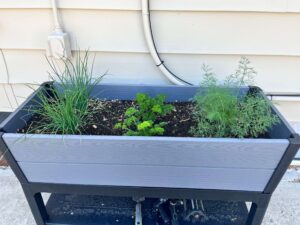
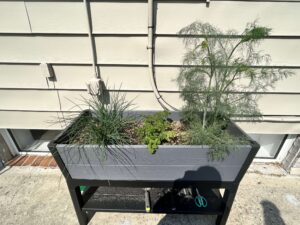
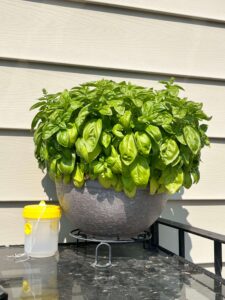
Chives, Parsley, Dill, and Basil
Update: At this point with my herbs, I am a bit worried that I may have overdone it. I don’t know what world I will be able to consume the amount of herbs that I have but I will certainly try!
What’s Next:
- Chives: According to MasterClass, “Harvesting chives is easy and straightforward. They can be harvested any time after the leaves have grown to about six inches tall. If harvesting the leaves, starting with the outer leaves first, cutting leaves about two inches from the base of the plant until you have the amount you need.
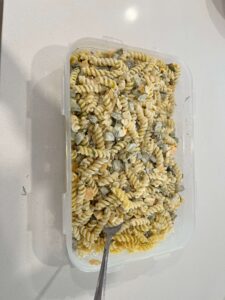
- Parsley, Basil, and Dill: I have started using my parsley, basil, and dill! If you are interested, please check out my blog post on making a lasagna with my homegrown parsley and basil or my blog post where I make a homemade dill pickle pasta salad using my garden-grown dill!
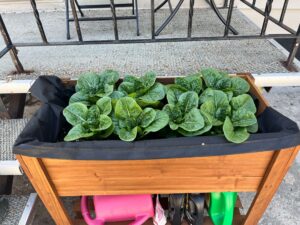
Romaine Lettuce
Update: I feel like a bit of a broken record here, but the lettuce is doing SO well. And there is SO much that we might be drowning in lettuce soon.
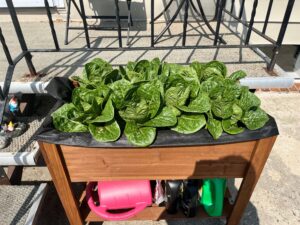
What’s Next: First will come harvesting the lettuce which will be soon:
And according to Tiny Garden Habit:
“Lettuce regrows once its leaves have been cut or picked off the main stem. As long as the root is intact in the ground and there are at least 1-2 inches of stem and leaves at the base, lettuce will shoot new growth in as little as a week. The cut-and-come-again harvesting method is the most popular.”
So that is an added bonus! But much like my tomatoes, we will have to part ways come fall as romaine lettuce is considered to be an annual.
All in all, this project has been immensely rewarding. I found myself in my yard more and more in the last few weeks, but I also found a deeper appreciation for the little things. Watching everything grow has given me the weirdest level of happiness and I have this project to thank!
But this project extends beyond my personal space. I was very hesitant at the start of this project to blog. And to be fully transparent, setting up the blog almost made me drop the class. But after a few phone calls to my sister, I made it through and I am so happy that I did (and yes I am a slightly dramatic human it wasn’t that bad). Posting and interacting with my fellow classmates has proven to be as equally as rewarding as watching my little tomatoes grow. Over the course of the term, I have been thinking of ways that I could incorporate blogging into my space, and it is one of the reasons I decided to apply to be a Connected Educator with the division I work for (fingers crossed) so I can have access to one-on-one technology in the coming school year. The value of blogging is immeasurable, but using it as a tool to help students engage with digital citizenship and technological literacy cannot be understated – something that I wouldn’t have believed six weeks ago.
I guess that is all for now folks! Maybe I will check back in next year since I already have big plans – clematis and ferns included!